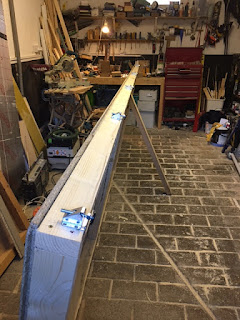
A couple of months ago I decided to re-join the OK Dinghy fleet. I've had two in my life. the last one sold - regrettably three or four years ago. It was a good one too! So I needed a boat. Why buy if I could build?
The Leech Kit seemed a pretty attractive and I do love wooden boats! So the build fee was paid to Dan and the Kit ordered from Fyne Boat Kits both at some expense. In the meantime epoxy and other materials was ordered from Wessex Resins. I had built a boat before using western red cedar and West Epoxy, but that was a long time ago.
My garage, an old stable, has a sloping floor with appropriate drainage, so a level base was essential.
 |
Note the adjustable feet
The space was tight and the Jig or Mould, if you want to call it that, was going to overhang a bit at the sides. The adjustable feet can be bought in Amazon and make levelling up pretty easy.
A week or two the kit arrived. There's a lot of it and it weighs a ton. It all needs to be kept flat and dry.
The next step is to cut out the jig. As you can see the parts are attached to the redundant parts of the board by little "tabs" which need to be cut through with a jig saw. It is best to cut on the redundant side of the tab and plane the tab on the part off with a block plane. This is a long job particularly when you get to the many parts of the boat itself.

Assembling the jig is quite straightforward as the parts slot together and it is well labelled. You do need to square it up and make sure it is straight. I used a large roofing square to get the aft end square as possible and then used metal brackets to fix it to the base. I continued to square up going forward and then used a laser level to mark the centre line down the bottom of the vertical stations. I also measured the diagonals from the top of station 1 (transom) to the top of station 4. I then put brackets everywhere i could to stop the whole thing moving. The horizontal stringers which you have to bend in exert a lot of force on the jig and will cause it to move around if it's not attached to the floor. I checked before I put the first floor panel in. More brackets went on! They need to go on the crossways jig components as well. I must have used 8 or 10. Two more are required at the bow, but I'll get to that later.
 Next you need to get hold of 4 x 23mm x23mm 4200mm lengths of softwood. That's the recommended size. I went 22 x 22 and that's a fraction too big to get into some of the cut-outs in the jig verticals. So next time if there is one I'll go 21 x21.
They have to be bent and screwed into the jig. Basically they help to form the chine. The ones at the front need to be twisted round to fit in. I used a plumbers "grip" to help to twist them.
Cedar is recommended for this. I used softwood with as few knots as I could find. Every one broke!
To solve the problem I scarf jointed the broken timbers with epoxy which solved the problem.
The length of joint needs to be 10 the width of the timber.
So with the jig
|
|
|


Comments
Post a Comment